
Need to add cookie consent to your site?
By the end of this guide, you will learn how to easily add cookie consent to your website and comply with privacy laws.
Here’s a sneak peek of what’s inside:
- Why add a cookie consent at all
- Use the CookieYes plugin
- Use the Cookiebot CMP plugin
Ready? Let’s get started!
Why add a cookie consent mechanism to your WordPress site?
The short of it is:
International privacy laws such as the GDPR and the CCPA mandate that websites obtain explicit consent from users before collecting their data through cookies.
By clearly asking for their consent before any cookies are used to collect data, you're showing your site visitors that you value their privacy.
In addition, it's a smart move to protect your site from potential legal penalties and fines associated with non-compliance.
👉 Related: Best WordPress Cookie Consent Plugins for Compliance
How to Add a Cookie Consent Mechanism to WordPress
There are numerous cookie consent plugins available for WordPress, each offering different features and levels of customization to meet various website needs.
But in this guide, I will specifically walk you through using two of the most popular plugins for cookie consent.
CookieYes
CookieYes offers a straightforward solution for integrating a customizable cookie consent banner into a website and is trusted by millions of websites.
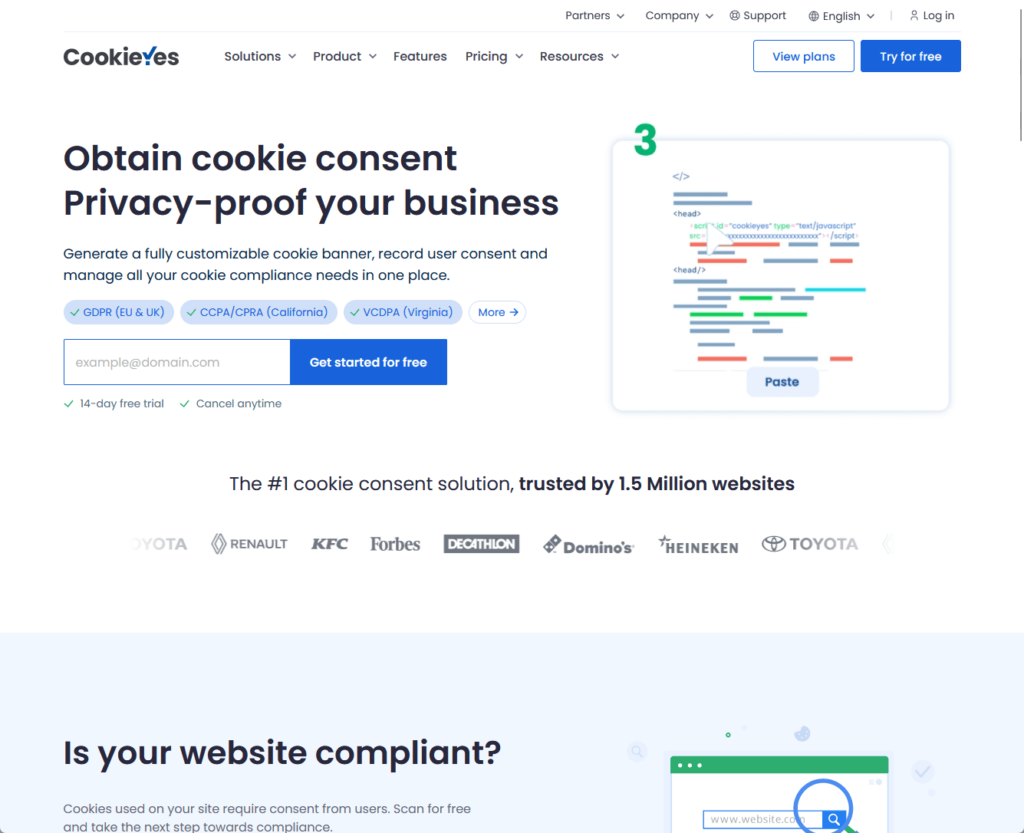
Here's a step-by-step guide on how to use CookieYes:
Step 1: Installing the CookieYes Plugin
Install the plugin like any other plugin from the repository:
- Go to plugins > add new plugin
- Search for the plugin
- Click the install now button
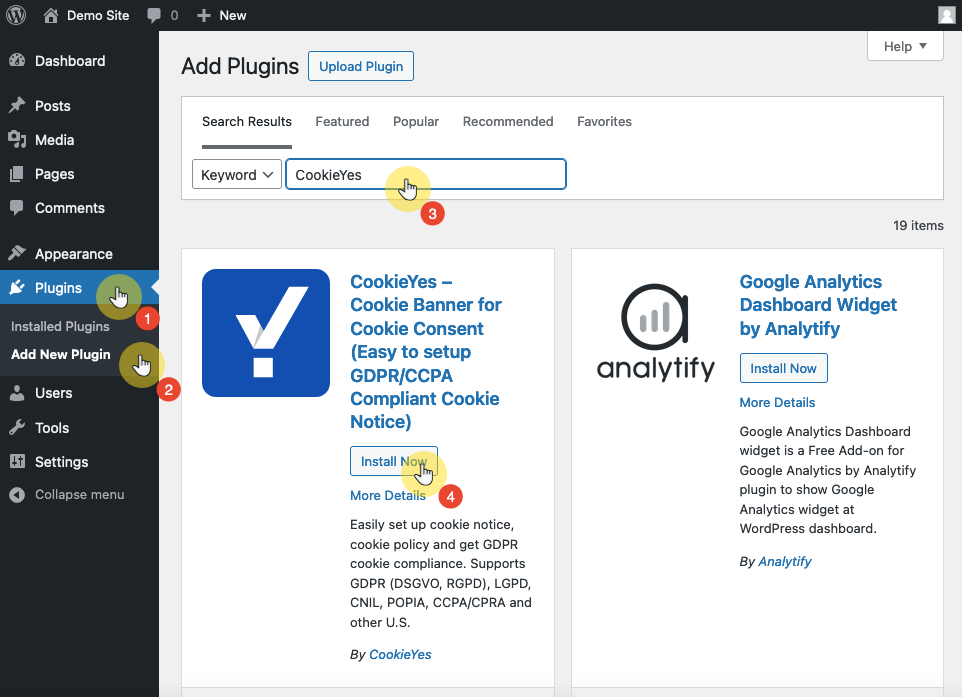
Make sure to activate the plugin to start using it.
After installing the plugin, consider the foundational support that makes your website run smoothly.
Opting for Hostinger as your web hosting provider further enhances your site's performance and security.

Discover the Hostinger advantage for your WordPress site:
- Enjoy a 99.9% uptime guarantee
- Affordable pricing at just $2.49/month (use the code darrel10 to get a discount)
- Global performance and reach with Hostinger's optimized hosting platform
This combination of CookieYes and Hostinger for web hosting represents a proactive approach to both user privacy and website reliability.
Step 2: Connecting CookieYes to WordPress
You need to connect the plugin to the CookieYes web app to unlock its full functionality.
- If you already have an account, you can log in using your credentials
- If not, you can create a new account directly from the WordPress dashboard under the CookieYes section.
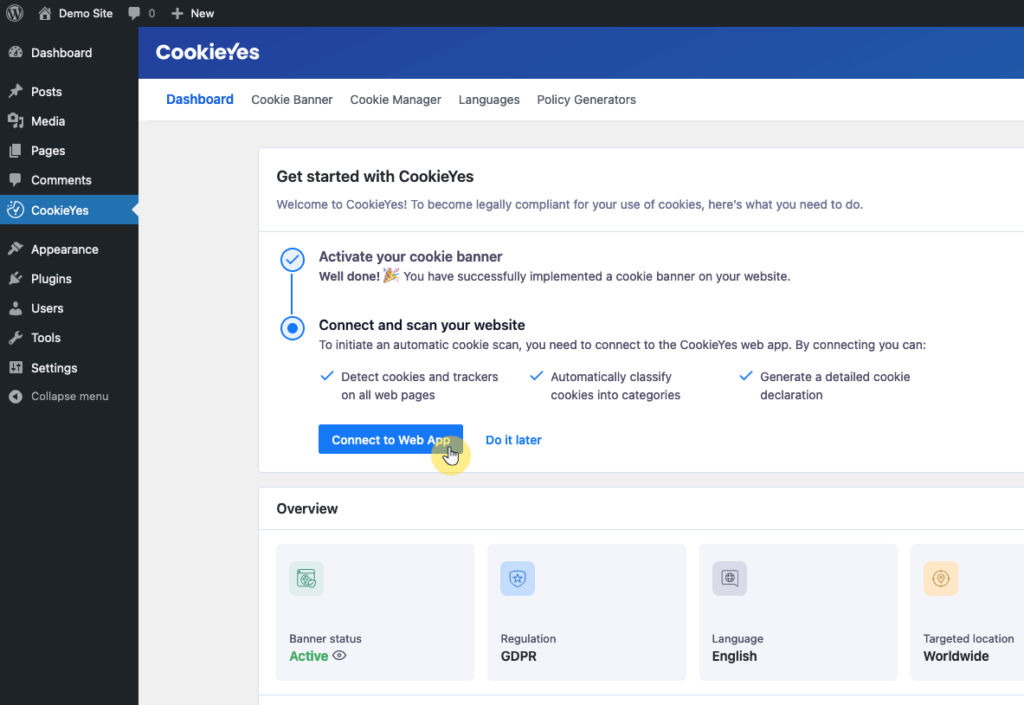
This step is important for accessing advanced features and configurations.
Step 3: Customizing the Cookie Consent Banner
You can now customize the cookie consent banner to fit your website's design and comply with legal requirements.
After selecting a layout, you can further customize the banner's appearance, including its content and how it behaves on your site.
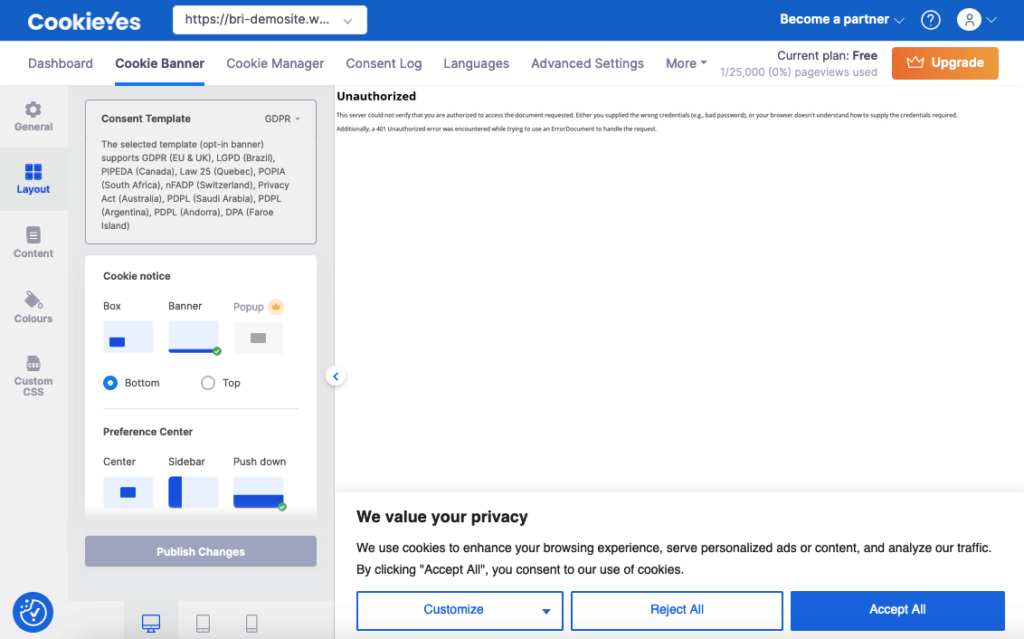
This customization process may involve:
- Editing text
- Changing colors
- Setting up the banner's position on the page
An important aspect of cookie consent is ensuring that third-party cookies are blocked automatically until the user gives explicit consent.
For scripts that aren’t automatically blocked, you can manually add their URLs in the settings or use the specific blocking code provided by the plugin.
This ensures that all types of cookies are only used with the user's consent, enhancing privacy protection.
Step 4: Providing Granular Cookie Control
To comply with various privacy regulations, it's important to offer website visitors control over the types of cookies they consent to.
With CookieYes, you can classify cookies into different categories, such as Advertisement, Analytics, and Performance.
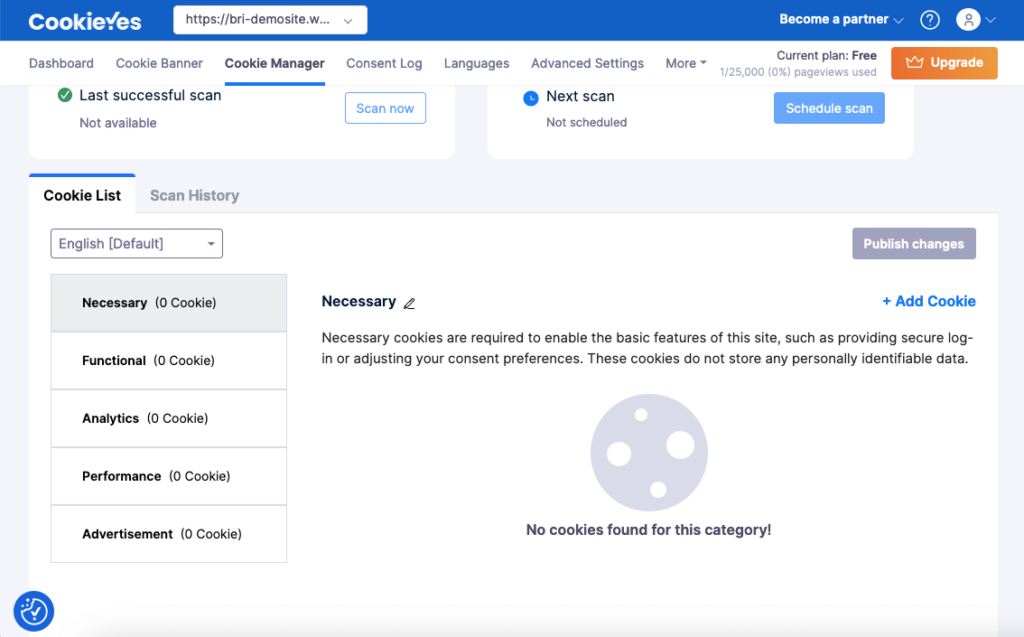
Users can then give consent for specific categories, allowing for a more personalized experience.
Cookiebot CMP
Cookiebot CMP is another popular WordPress cookie plugin that offers a highly customizable consent banner, an automated cookie scan, and multilingual support.
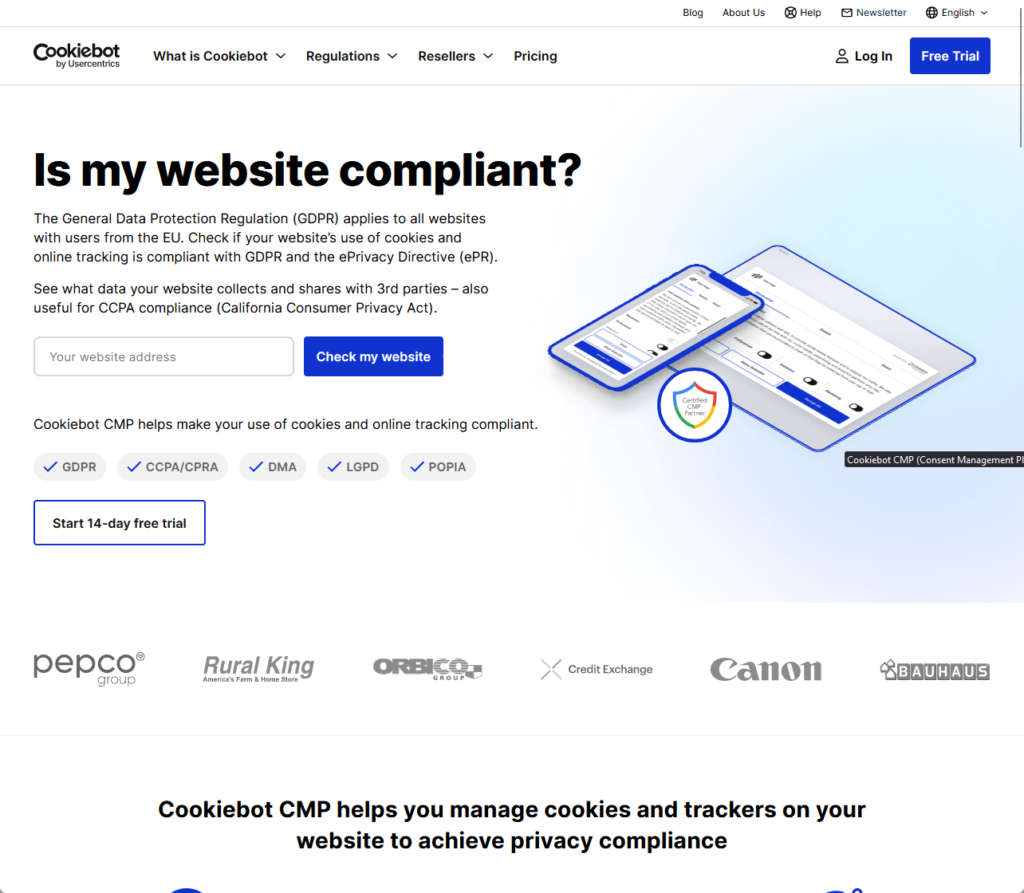
Here's a detailed guide on how to implement Cookiebot CMP on your WordPress site:
Step 1: Installation and Setup Process
What you need to do first is to sign up for an account on the Cookiebot website.
Once you have your account set up, proceed to install this GDPR cookie consent plugin:
- Go to plugins > add new plugin
- Search for the plugin
- Click the install now button
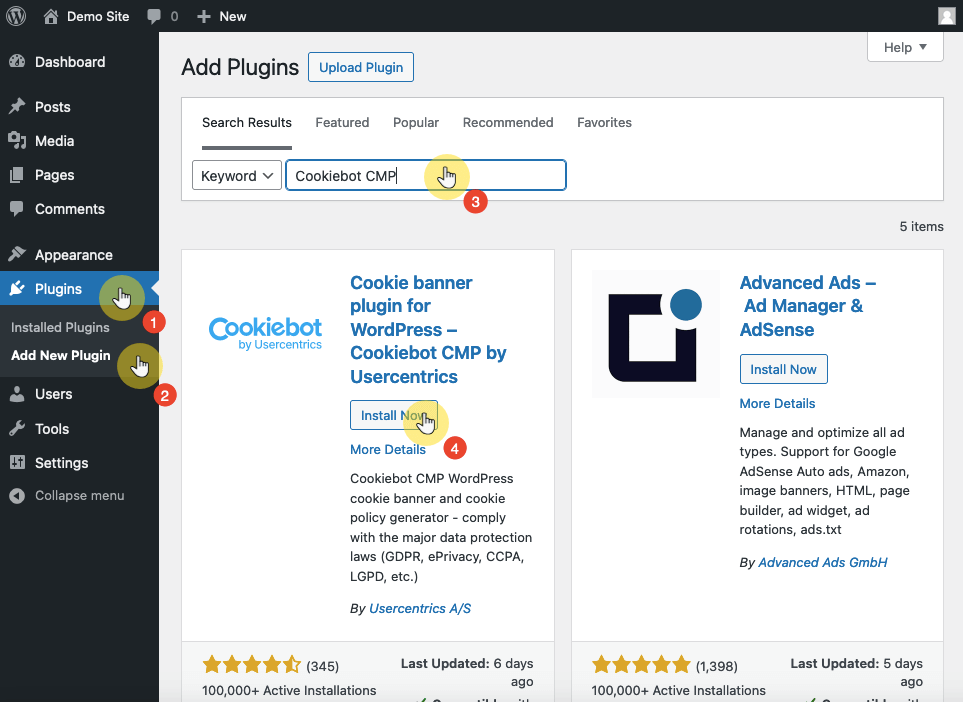
Activate it to enable its features.
Step 2: Connecting Cookiebot CMP to WordPress
The next step is to log in or create an account (if you haven’t already) from your dashboard.
Then you need to add your domain group ID:
- Navigate to Cookiebot > settings from the admin dashboard
- Enter your domain group ID in the field provided
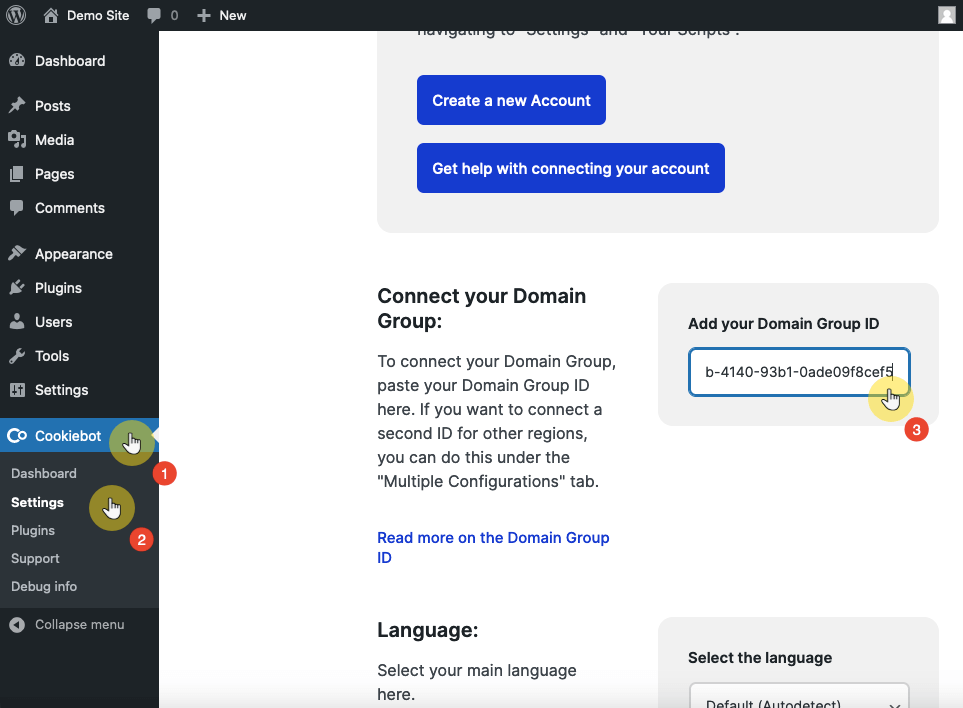
To find your domain group ID:
- Log in to the web app
- Navigate to domains and aliases > domain groups
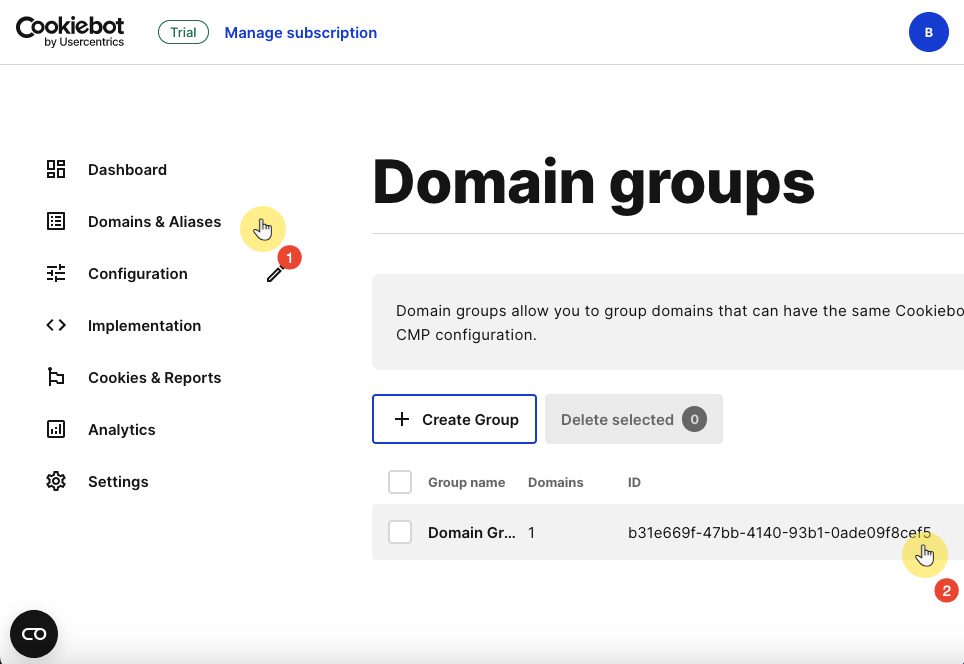
Just copy that and paste it into the field I showed earlier.
Step 3: Customizing the Cookie Consent Banner
What you need to do now is to customize the cookie consent banner to suit your website's aesthetic and legal needs.
In the web app:
- Go to configuration
- Select your preferred banner style
- Customize the appearance
I’m talking here about the design, content, and language options.
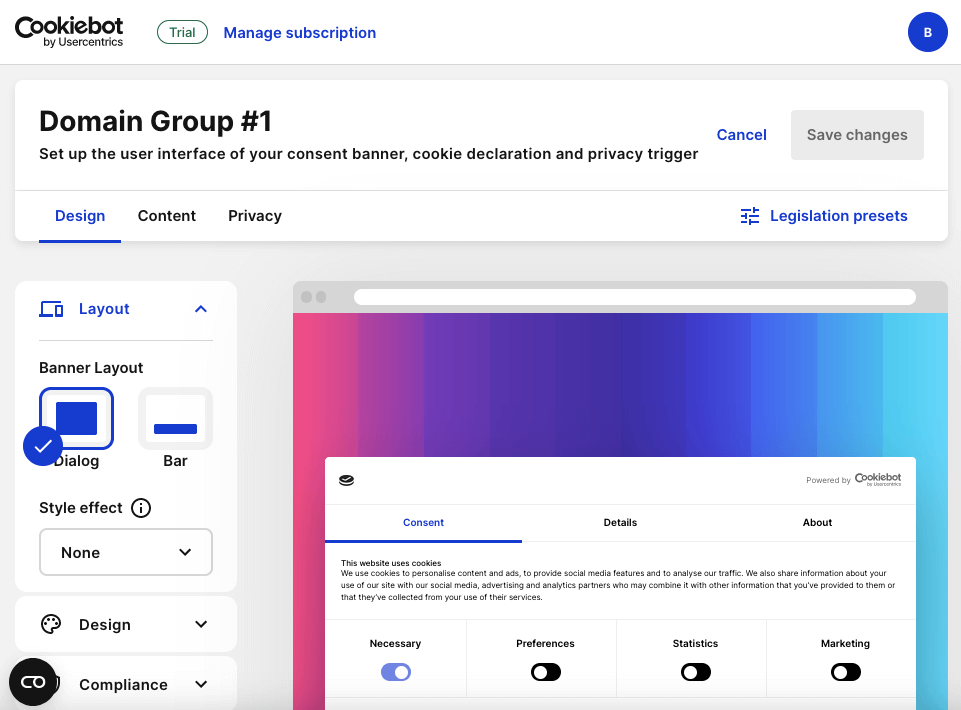
Once you’re satisfied with the design, proceed with the next step.
Step 4: Implementing Prior Consent and Auto-Blocking
A key feature of Cookiebot CMP is its ability to enforce prior consent and automatically block cookies until consent is given.
For cookies that require manual intervention, Cookiebot CMP provides the option to manually mark up cookie-setting script tags on your WordPress website.
You can find it under the cookies and reports section:
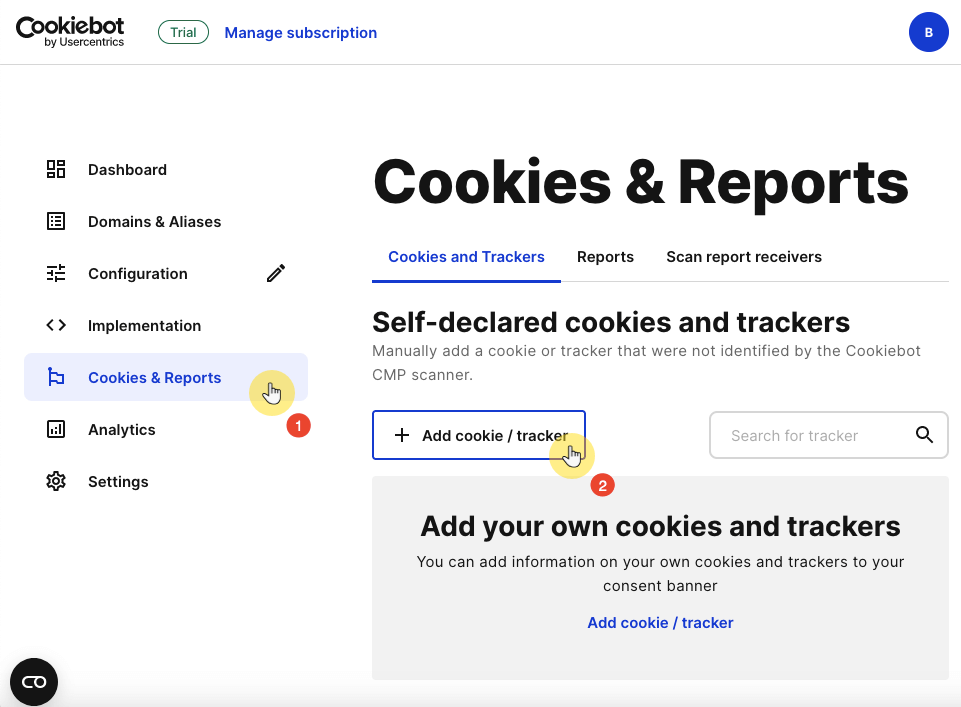
After the initial website scan, you may find cookies that must be classified.
Within your Cookiebot account, you can classify these cookies and add descriptions of their purposes.
Cookiebot CMP then activates only the categories of cookies that the user has consented to, while withholding all others.
Implementing a Cookie Consent Mechanism
While this guide highlights only two WordPress plugins, the steps for integrating other cookie consent plugins into your WordPress site are more or less similar.
Implementing a cookie consent mechanism not only ensures your site's compliance with privacy regulations but also respects your users' privacy preferences.
Remember to regularly review and update your cookie classifications and consent settings to maintain compliance and adapt to any changes in privacy legislation.
Wrapping up, it's also essential to enhance your site's design and functionality continuously.
Darrel Wilson has an exclusive offer to keep your website at the forefront without the constant hassle of theme and template updates.

Secure lifetime access to all premium Elementor template kits:
- Get lifetime access to all premium template kits designed for Elementor
- Complete with 2 years of dedicated support
- Only for $99 — that's already for the lifetime access
This special offer is the perfect way to keep your website stylish, modern, and engaging.
Say goodbye to the endless cycle of updates and support fees.